Monday, December 29, 2014

G.G.'s Tapioca Pudding


  Tapioca pudding brings the memories flooding back!  It has always been a staple at Christmastime.  I have made this a few times in the past and I have not been able to get it perfect yet.  Today, it was just about perfect!  I thought I had messed it up again because it did set up, but when you scoop out a serving, the rest of the pudding filled in the hole.  I asked my uncle about that and he informed me that is how it is supposed to be. Last year, I don't know what went wrong, but it never set up.  This time, I paid close attention to the instructions and it actually worked!

As you can see above, the recipe is a bit all over the place.  Some of it is left up to interpretation.  Here is what I did:

3/4 Cup        Tapioca (I used 1 cup because I do what I want.)
3 Cups          Milk (Whole Milk is recommended)
1/4 Cup         Cornstarch
3/4 Cup         Sugar
2                   Whole Eggs
3                    Egg Yolks
4 Cups           Milk
1 Tablespoon Vanilla

- In a double boiler, cook tapioca in 3 Cups milk until transparent.  Cooking time can vary depending on what type of tapioca you use.  I used Minute Tapioca this time.  It was ready in...well...minutes.  Traditionally, GG used to use the biggest tapioca balls she could find.  That is how I prefer it too.  This process can take more like 30-45 minutes or more.

- In a separate bowl, mix cornstarch and sugar together.  Add 2 whole eggs and 3 egg yolks.  Beat slightly.

- Add another 4 cups milk to the tapioca. Slowly add the egg mixture to the tapioca while stirring constantly.

- Keep stirring constantly!  Cook on medium heat until the foam on the surface disappears.  This took about 20 minutes for me.  Take care not to let it get too hot.  You don't want scrambled eggs in your pudding!

- Remove from heat and add 1 Tablespoon vanilla.

- Pour into 9x13 pan and cool completely.  Depending on how you plan to serve the pudding, you can put it into a 9x13 pan (which was filled to the brim!)  or you can pour into individual serving bowls and chill that way.

- Once it is completely cool and set, cover with meringue.  I chose not to cover with Meringue this time around and it still came out pretty tasty!


**Fun Fact** Unrelated to the making of this recipe, if you look closely, you will see "Genevieve" written on the original recipe.  As most of you know, we are expecting our second child this May and if it were going to be a girl, Genevieve was going to be part of her name.  We had decided this before I noticed Genevieve written in my G.G.'s handwriting on this recipe.  You can imagine our surprise when we discovered this!  I took it as a sign from Spirit that we were on the right track.  :)  Turns out this baby is a Boy, but it is still a fun story anyway!

Friday, December 26, 2014

Reese's Peanut Butter Balls

Merry Christmas everyone!  A long-standing tradition in this house has been the one and only Peanut Butter Balls.  It just isn't Christmas without them!  I remember there were a few times in the past that on the night of December 23rd, Mom would be working late to get last-minute things done before taking a few days off to enjoy the holiday.  That would mean that the making of the Peanut Butter Balls wouldn't begin until late into the night.  Lucky me, I got to stay up late and make them with Mom! Yay!  We would be rolling the balls at Midnight.  At 2:00 am, we would be dipping them in chocolate.  If that isn't dedication to a tradition, I don't know what is.

The tradition must go on!  It is Christmas Eve and I have the family coming over for dinner tonight.  Chili, cornbread, tamales, tapioca pudding, and peanut butter balls are on the menu!  I can't wait to eat!  We have been out of town the last few days, so I am just getting around to the Peanut Butter Balls.  I realize I am pushing the envelope here, but at least I'm doing it!

1 lb Margerine (I use butter, of course)
2 Cups Peanut Butter
2 1/2 - 3 Boxes (2 1/2 - 3 lbs) Powdered Sugar
3 Tablespoons Vanilla Extract
1 Large package semi-sweet Chocolate Chips
1 package Butterscotch Chips
1/3 stick Parowax

-  Cream butter and peanut butter together.
-  Add 3 Tablespoons vanilla extract.
-  Add powdered sugar 1/2 lb at a time.  When the dough unsticks from the side of the bowl, it is done.  It should be about the consistency of cookie dough.
-  Roll into balls.  I use a Tablespoon to measure them out so they are relatively uniform.  I got 105 balls this time around.  Line baking sheet with wax paper and line up the balls.  Freeze for at least 1 hour.  This is important because when you go to dip the balls into the chocolate, they will stay together .
-  Use a cheese grater to grate the Parowax.  This is the fastest way to shred it up and it will be in small enough chunks to melt right into the chocolate very easily.  (For years, Mom would use a paring knife to cut off small pieces of wax.  This would take SO long to do.  Then 2 years ago, I was over using the knife and pulled out the cheese grater.  Mom was floored!  She couldn't believe she hadn't thought of that years ago. Hehe!  A fun memory!)
For anyone unsure of where to find Parowax, check the canning section of your grocery store.

-  Over a double-boiler, melt semi-sweet chocolate, butterscotch chocolate and Parowax.
-  Dip balls into chocolate and refrigerate until chocolate is set.  I have yet to find a faster way to dip the balls into chocolate other than by dropping the ball into the chocolate and then using two spoons, lift the ball out and pass it back and forth between the spoons to get all of the excess chocolate off.  Make sure to cover the balls completely in chocolate.  It's just better that way!


  Now, proceed with caution! These little gems are delicious.  I have eaten 5 already. 


Wednesday, December 17, 2014

Amish Friendship Bread

 As you can see, this recipe is well-loved!  Mom used to make this bread all the time!  I have very fond memories of licking the wooden spoon as the loaves were baking in the oven.  This is the first time I have ever made it all on my own and it is exactly how I remember it.  This bread makes me feel all warm and fuzzy inside.  I have a tendency to eat too much of it!

I did not receive batter made from someone else, so I made my own.  I pulled this from here.

1 (0.25 oz) Package Active Dry Yeast
1/4 cup warm water
1 cup all-purpose flour
1 cup sugar
1 cup milk

1. In a small bowl, dissolve yeast in water.
2. In a separate bowl, mix flour and sugar with a fork.  
3. Slowly stir in milk and yeast/water mixture.
4. Transfer to large ziplock bag.  Consider this "Day 1."
For the recipe:

General:  Do not use  metal bowl or spoon when making.  Do not refrigerate.  If air gets into the bag, let it out.  Bubbling, thickening, and fermentation are normal.

Day 1:  The day you receive the batter, do nothing.
Day 2:  Squeeze the bag (squeeze for each word and say, "Monday, Tuesday Wednesday, Thursday, Friday, Saturday, Sunday.") Oh my gosh, how Amish...
Day 3: Squeeze the bag (squeeze for each word and say, "Monday, Tuesday, Wednesday, Thursday, Friday, Saturday, Sunday.")
Day 4:  Squeeze the bag (squeeze for each word and say, "Monday, Tuesday, Wednesday, Thursday, Friday, Saturday, Sunday.")
Day 5:  Squeeze the bag (squeeze for each word and say, "Monday, Tuesday, Wednesday, Thursday, Friday, Saturday, Sunday.")
Day 6:  Add 1 cup sugar, 1 cup flour, 1 cup milk and squeeze the bag
Day 7:  Squeeze the bag (squeeze for each word and say, "Monday, Tuesday, Wednesday, Thursday, Friday, Saturday, Sunday.")
Day 8:  Squeeze the bag (squeeze for each word and say, "Monday, Tuesday, Wednesday, Thursday, Friday, Saturday, Sunday.")
Day 9:  Squeeze the bag (squeeze for each word and say, "Monday, Tuesday, Wednesday, Thursday, Friday, Saturday, Sunday.")
Day 10:  Follow Steps 1 and 2

Step 1:  Combine in large bowl:  Batter from the bag, 1 cup sugar, 1 cup flour, and 1 cup milk.  Mix with wooden spoon or spatula.  Pour four 1 cup startes into zip lock bags.  Keep one for yourself, and give the others to friends, including instructions.  Now continue on to Step 2.

Step 2:  (Still Day 10)  To the remaining batter in the bowl (1 cup) add the following:
2 cups Flour
1 cup Oil (can substitute 1 cup applesauce + 2 Tbsp oil) -  I used applesauce since it is how Mom always made it.
1 cup Sugar
1/2 tsp Salt
1/2 cup Milk
1 tsp Vanilla
3 large Eggs
1/2 tsp Baking Soda
2 tsp Cinnamon
1 1/2 tsp Baking Powder
1 box Instant Vanilla of Banana Pudding (optional)
1 cup chopped Pecans or Walnuts (optional)
1/2 cup Raisins (optional)

Pour into 2 large well-greased and sugared (mix sugar & cinnamon) loaf pans.  You can sprinkle extra sugar & cinnamon on top if desired.  Bake at 325 degrees for about 1 hour

 Note the wooden spoon above.  I wish I had an explanation for why a wooden spoon is necessary, but my guess it's an Amish thing...like everything must taste better with a spoon whittled from a branch in their own yard?  I must say,  licking a wooden spoon is way better than metal.  Not that you should lick utensils when cooking for others, but if it's going right into the sink afterwards, I don't see the harm.  ;-)
Pans sprinkled with cinnamon & sugar.  I highly recommend doing this!

I doubt I made this up, but a trick I use to getting 2 even-sized loaves is to use a measuring cup to scoop batter into pans.  I used a 1 cup measuring cup to evenly pour these and got just over 3 cups of batter into each pan.


After 60 minute in the oven,  I stuck a knife into the bread and it did not come out clean.  I gave it an extra 5 minutes and it came out perfectly!  It is absolutely wonderful.  Even the baby loves it!  She keeps whining at me to give her more!  If that isn't a good sign of a recipe you should most definitely try, then I don't know what is.

Saturday, December 13, 2014

Chicken Broccoli

BINGO!  I have chicken in the fridge I need to use ASAP.

4 Boneless Skinless Chicken Breasts
2 cans Cream of Mushroom Soup
2 bags Frozen Broccoli (I used fresh)
1 Large (16 oz) container Sour Cream
Grated Cheddar Cheese

- Mix mushroom soup and sour cream
- Place 1/2 mix in bottom of 13x9 baking dish.
- Braise chicken.
- Cube chicken and place chicken on mixture. (my one recommendation)
- Place broccoli on chicken.
- Cover chicken and broccoli with remaining mixture. 
- Cover with grated cheese.
- Cover with foil. Bake @ 350 for 1 hour.

This one is pretty straight forward...until it says "Braise Chicken".  Um, what the heck is braised chicken?  So, I looked it up.  For more info on how to braise chicken, click here.  Newsflash!  It takes too long.  I am the Mom of a 17 month old.  Ain't nobody got time for that!  So, I followed the instructions from my BFF, Pioneer Woman, and quickly seasoned those breasts with salt and pepper and baked them for 30 minutes at 375 degrees.  Here is where I learned how to bake chicken from her amidst an amazing Chicken Tortilla Soup recipe that you simply MUST try!  

Once the chicken is cooked, layer that bad boy casserole and throw it in the oven. 

Mom got this one right in the easiness category!  Also, it is dangerously delicious!  I do not have a photo of the finished product here because I ate it too fast before I could document it.


Tuesday, December 9, 2014

Orange Cookies

  Tonight, I was in the mood for cookies and came across these Orange Cookies.  I remember my great grandmother (G.G.) used to make these and I thought it would be a wonderful way to kick off the blog and the Christmas season!  First off, there are two recipes.  They are the same, but written twice.  I am not sure why other than for the sake of clarity.  Now, I shall attempt to clarify even further.

1 Orange (I used two small oranges)
1 Cup Crisco*
2 Cups Sugar
2 Eggs
1 Cup Milk (sour the milk with 1 Tablespoon Vinegar - there was no specification on what type of vinegar.  I used Apple Cider Vinegar and it worked just fine)
1 tsp. Baking Soda
3/4 tsp Salt
5 - 5 1/2 Cups flour


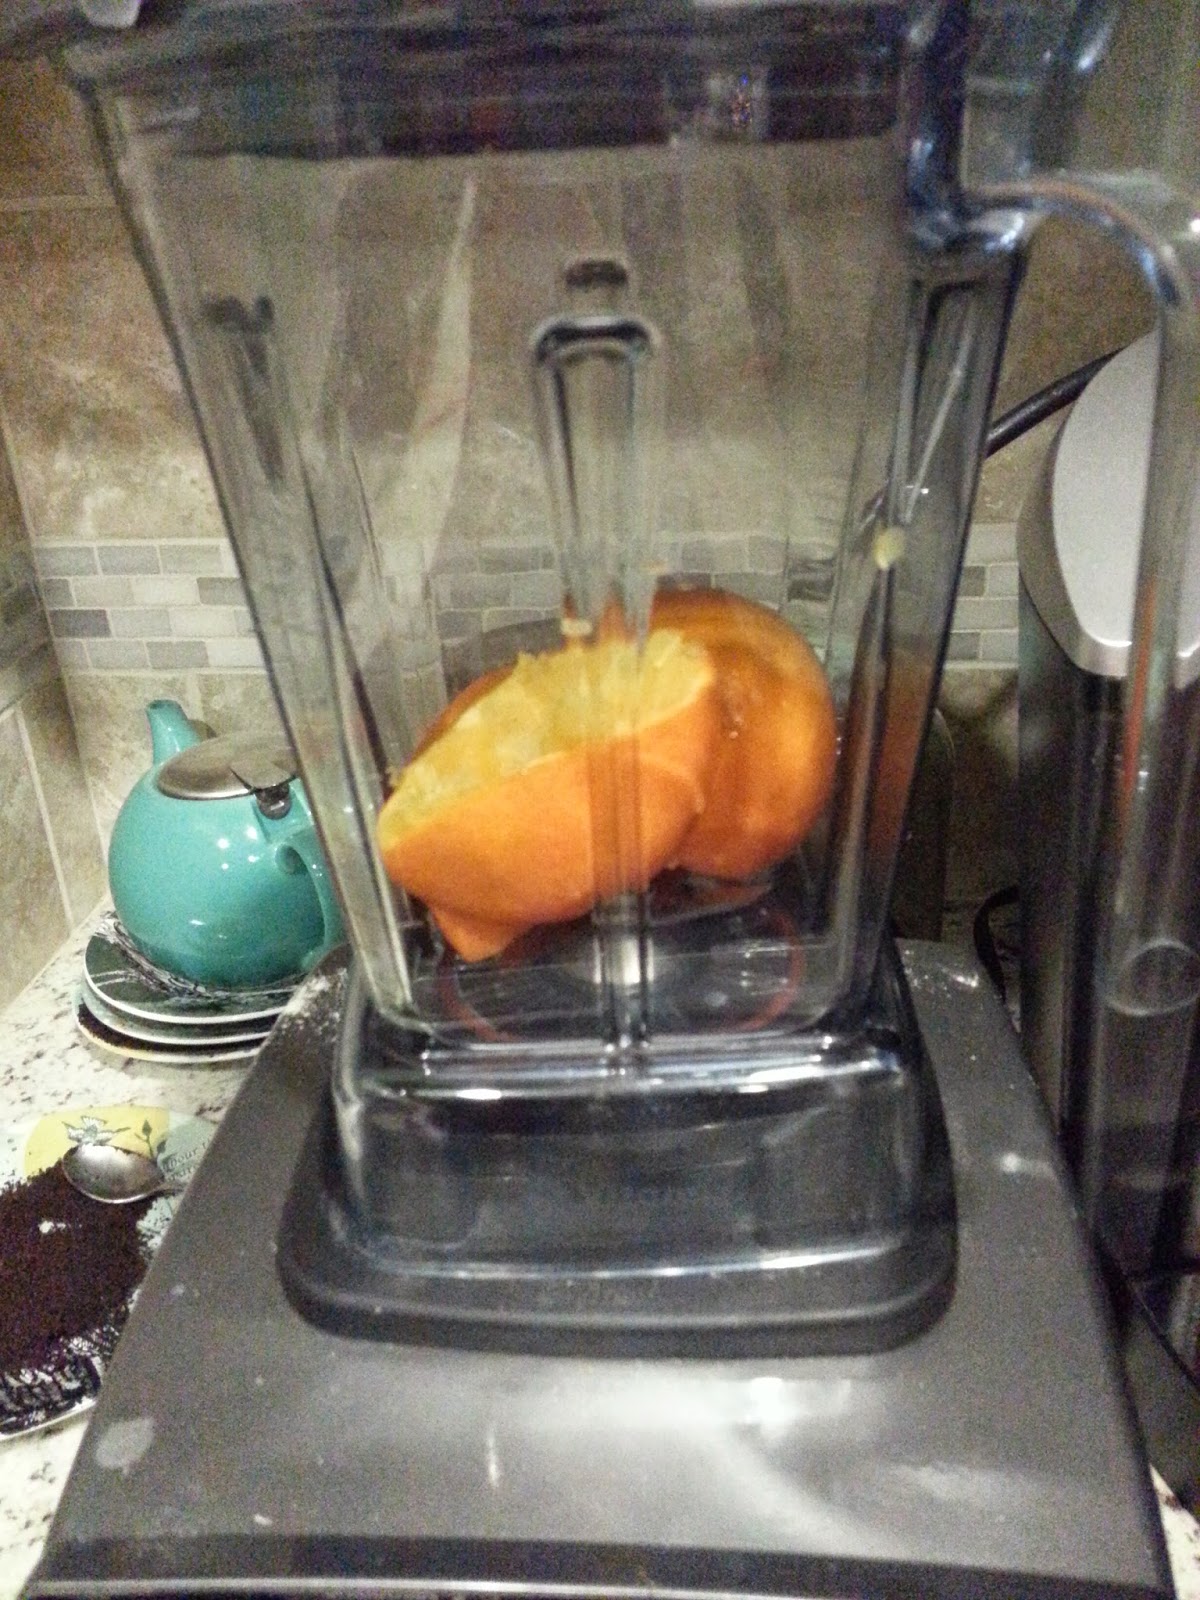
1)  Juice the orange and set aside.  Put rind and pulp into food processor (or in my case, the Vitamix) and grind up.  I would also like to add that I ended up putting the juice back into the blender with the pulp with a little water so that it would actually blend.  In hindsight, I should have just tossed both oranges into the Vitamix to begin with.

In the end it looked something like this.
2)  Cream Crisco and Sugar together.
3)  Add eggs one at a time
4)  Add orange juice 
5)  Add baking soda to the soured milk and add to mixture.
6)  Add salt and flour.
7)  Drop onto baking sheet and bake at 375 for 10-12 minutes depending on the size.  

FROSTING
Juice 1 Orange
1 Tbsp Butter
1 lb. Powdered Sugar

1)  Mix until smooth and spread on cool cookies.


I ended up using about 6 cups of flour to get the consistency I wanted.  I think I ended up adding too much flour.  OOPS!  Also, my cookies did NOT bake all the way through after 9 minutes.  I think they needed an extra 2 minutes, but overall, the flavor is THERE and it is delicious.  I must admit, I ended up getting tired and did not frost them.  They are still tasty without the added calories of the frosting.  So, I am happy to report that my Santa cookie jar (which used to be Mom's) is now full of delicious under-baked orange cookies that bring back happy memories!  

*DISCLAIMER:  While leafing through these recipes, I see that most of them call for Crisco or Margarine instead of butter.  Now, one of my life mottos is "Butter makes everything better".  In this motto, the word "Butter" is always interchangeable with the word "Bacon", but I digress.  I, personally am not a fan of Crisco.  Other than the fact that it has a high melting temp and frosting keeps its shape and consistency better with shortening, I tend to avoid it at all costs.  Just know that butter can almost always be substituted...and most times, I WILL be making that sub.

Here's are more reasons why I love butter.  The Benefits of Butter...published on my other blog, Cassierole by yours truly.


Monday, December 8, 2014

Let's Begin!

  It all began in my Mother's kitchen years ago.  Being a single mother of two kids, she was not the type to spend hours upon hours in the kitchen.  Dinner usually consisted of a mix between something frozen and something canned, but it was always delicious!  Between working 40-60 hours a week and having kids involved in sports, she did her very best to make sure we were eating well.  She had a few go-to recipes that were our favorites and a few she would whip up from scratch and I still crave them to this day.  Just because she did not cook a gourmet meal every day, didn't mean that she didn't want to.  She had a few recipe books STUFFED with recipes.  Most were handwritten, some were saved from newspaper clippings and there is even a box of tapioca saved for the recipe for pudding on the back.  I imagine her scanning the paper, seeing a recipe and dreaming of making it to try something new and exciting.  Unfortunately, most of the time, there was never enough time in the day to try any of these new and exciting recipes.  So years later, they remain stuffed between the pages of her recipe books.

Let's fast forward to March 13th, 2013.  This was the day our family got the gut-punching news that my Mother had been diagnosed with Stage 2 Pancreatic Cancer.  I was somewhat familiar with what that could mean, as my grandfather passed from Small Cell Lung Cancer in 2003, but this was different.  This was MY MOM.  My Mom, my best friend in the entire universe couldn't possibly be plagued with something so horrible as Cancer.  Being pregnant at the time, I remained insufferably hopeful that she would beat this monster.  She did everything possible to try to keep me calm and hopeful and I love her so much for that.  Sometimes I would wonder why she didn't tell me certain things that she knew about her health.  We told each other everything!  But now that I am a Mom myself to a very healthy and fast-growing daughter, I think I can understand exactly why she did everything she did.  She was trying to protect her kids.  I never want to see my little one in pain and I most certainly would have done the exact same thing she did if it were me.

  My sweet Mother lost her year-long battle with Pancreatic Cancer on March 7, 2014.  Almost exactly 1 year from diagnosis.  I feel that I immediately had to grow up and be the Mother of my family.  Even though I know I will forever be my Mother's little girl, I felt that I was no longer a daughter.  It has been the hardest thing I have ever gone through.  Overall, I have been doing okay.  My faith keeps me upbeat and strong and my family keeps me grounded.  I will forever be thankful for them!  But I do not know if I have really dealt with the loss.

  So, in an attempt to help cope and move forward, I have made it my latest project to cook my way through the jumbled mess of recipes that my Mother kept for all those years. Being a stay-at-home Mom, I have a little more time than she did to give some of these a shot and see through her dream of trying some of these recipes out.  Who knows, maybe my family can begin to create some new traditions with the help of the past?

Please enjoy this ride with me and if you end up cooking right alongside with me, even better!  So let's get cooking!